Followers

Friday 11 December 2015

O Holy Night - Groovi card


 For this card I've again used the Clarity Groovi plate, I really love this piece of equipment and am growing in confidence with my parchment work.


I've used 4 different plates for this card and combined them to give my interpretation of the theme 'Christmas Story'.
Oval Nesting plate - Outside edge and the glow from behind the hills
Banners Border plate - Banner & wording
Scenery plate from starter kit - Hills & used the straight line to make the star
Deer Christmas Plate - Used the dots on the deer to make the stars
I've then used Spectrum Noir pencils to colour the sky, glow and banner and mounted on black card.

I am entering this card into the following challenges:

Claritystamp - Christmas Story - 31/12/2015
Polkadoodles - Traditional Christmas - 18/12/2015


Tuesday 17 November 2015

Tatty Sleeps

For this card, I've used a Tatty Twinkles stamp I've has since launch but never even opened! I love this image, it's so cute and I love the open spaces on the petals, gives real scope to able to colour easily.The backing paper is from Craftwork cards and suits the colours I've used perfectly.


Sunday 15 November 2015

Classy birthday card

Hello all, for today's post I've made a very simple card, but none the less very classy. I've used the Groovi system from Clarity and backed the parchment paper onto black card.


I love parchment craft, but as of yet have had very little time to play, hopefully I will get some more time to practice soon.

I am entering this card into the following challenges:
Clarity Stamp - CAS - Top 5


Friday 13 November 2015

Polkadoodles - Autumn colours

Wendy - For my autumn colours, I've gone with greens & browns and there's nothing more autumny than a gorgeous Scarecrow, This handsome gent can be found as part of this years Autumn/Fall bundle get it here, as are the little toadstools. The papers are also part of the complete collection, but can also be purchased as paper packs here.


Tuesday 10 November 2015

Digi Choosday - Christmas with sparkles

What's Christmas with out sparkles! For my image I've used Frosty Penguins from the Octavia Frosted Winter collection. You can also get the image as an individual digi here. My sparkles are from using the new Spectrum Noir Sparkle pens.


Spectrum Noir Markers used:
Cost - DR7 DR5 CR8 CR6 CR5
Scarf & Undercoat - BT6 BT5 BT4 BT3
Hair & Penguins - True Black, IG10 IG8 IG6 IG5 IG4 IG3 IG2 IG1

Spectrum Sparkle Pens used:
Solar Red & Soft Jade

I've also used the Die'sire Snowflake Edgeable die and finished with Cosmic Shimmer White Pearl PVA.

Join us for this weeks challenge at

Digi Choosday

I am entering this card into the following challenges:
Spectrum Noir challenge - Christmas/Winter - Top 3


Tuesday 3 November 2015

Digi Choosday - Red, Orange & Brown

Reds, oranges & browns say autumn to me, which here in the UK means rain! And what better image than Twiggy & Toots rainy days. You can get the digi on its own here or as part of the Twiggy & Toots collection, here. The birdhouse card template I've used is also on the collection.


I've used Sprectum Noir Alcohol Markers as follows:

Umbrella - DR7 DR5 CR8 CR6 CR5
Owls - TN8 TN5 TN3
Boots - OR3 OR2 OR1 LG5
          - LG3 LG2 LG1
 Pots - TN8 TN7 TN6 TN5 TN4 TN3 TN2 TN1
Bricks - TN8 TN7 TN6 TN5 TN4 TN3

Join us for this weeks challenge at

Digi Choosday


I am entering this card into the following challenges:
613 Avenue Create - ATG - 07/11/2015
Scrappy Hands - Fall - 27/11/2015
Crafty Boots - Autumn - 07/11/2015
Creative Card Crew - Off the edge - 08/11/2015


Tuesday 27 October 2015

Digi Choosday - Favourite Colour Combo

One of my favoured combo's is pink & green, I love the contrast of them together. For this card, I've used Octavia - Bird in Hand as my main image. The sentiment is also Octavia, but from the Moonfly collection, as is the alphabet I've used to make the 'daughter' tag and the pink backing paper.


I've coloured with Spectrum Noirs for the main image:
Dress - DG4, DG3, DG2, DG1
Hair - EB8, EB5, GB10
Skin - TN4, FS4, FS1
Bird & Cage - EB8, EB5, GB10, GB8
The 'Daughter' tag is from Spellbinders 5x7 Elegant Labels 4 die set and the flowers are from Wild Orchid Flowers.

Join us for this weeks challenge

Digi Choosday

I am entering this card into the following challenges:


Saturday 24 October 2015

Polkadoodles Create & Craft show and THOSE shoes!

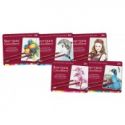
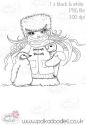
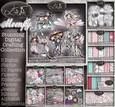
Ok, so I said I'd be back this weekend with my instructions to making the shoes covered with pages from Nikkys fabulous Florabunda colouring book CD. It's now sold out on Create and Craft, but you can get your copy of both the first and second CD here 

So down to business:

1. Using cheap copy paper, curve this round the shape of one the outside edge of one of your shoes, so it fits tightly at the edges & trace the edge lightly with a pencil.


2. Repeat step 1, but for the inside edge and the toe and cut, making a note on each piece on the side facing out from the shoe, which section it is for and whether it's left or right. (Note, there is no need to cut a second set for the other shoe, just flip the ones you've already done!)


3. Now the hard bit, choose which of Nikkys gorgeous papers you want use.

4. Using your templates, trace round them and cut directly out of the colouring page. I managed to fit all three templates onto one A4 print out.


5. Flip your templates, and repeat for the other shoe, you should now have six sections ready to colour. (Be sure to note and the back of each in pencil left/right and inside edge/outside edge)

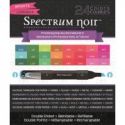
6. Get colouring! I would recommend using alcohol markers for a tidier and brighter finish. This is because the glue you will be using will be water based and any other medium may smudge when pasting the glue on.


7. If you are using a smooth pair of shoes, gently rub the exterior with sandpaper, this helps the paper and glues to adhere to shoe.

8. Using a either a thin PVA or other clear drying glue (I've used Mod Podge), cover the underside of one of the coloured side sections and manipulate it onto the side of the shoe. This can take some time to get all the edges in the right places, but the more glue you use, the easier it will be to move, but be careful not to tear the paper, as it will be quite wet and delicate.


9. (Now the messy bit!) When the side piece seems pretty much in the right position, paste more of the glue over this and smooth with your finger. This gives you more opportunity to get everything in just the right place.

10. Repeat for the second section and the toe and leave to dry.

11. If you are intending to wear your shoes outside, now use either a varnish or Mod Podge Exterior (with the green label) and cover the shoe completely again, this time though, pay particular attention to the edges of the paper, to ensure water can't get under them. Again leave to dry completely.

12. As a finishing touch, I've used fringed ribbon round the edge, it just gives them a little bit of 'Je ne sais quoi!'


13. ENJOY! Enjoy all the admiring comments you're going to get, for a a pair of very pretty and very unique shoes!